Hello...

Welcome to the Kirklees Wargames Club blog and forum. We are a small group of table-top wargamers who get together weekly to play games which vary from Ancient/Medieval, through English Civil War, American War of Independence, American Civil War, and all things Napoleonic, plus WW2 to Sci-fi and fantasy, using scale-model armies on purpose-built terrain and scenery. We meet at Beaumont Park Visitors Centre, Beaumont Park Road, Huddersfield HD4 7AY on Monday evenings from 6.15pm. New members (over 18) are always welcome. You can just drop in or contact us on: kirkleeswargamesclub@gmail.com. Facebook: Kirklees Wargames Club and Twitter: @KirkleesWC
Showing posts with label Adrian. Show all posts

Thursday, 3 April 2025

GdA2 - Russians attack Austrians and give them a damned good Paggering (but lose the game)

The attacking Russian (Robin and Guy) force broke several Austrian (Jeremy and Adrian) infantry battalions and cavalry regiments through judicious use of artillery, musket fire, and charges.

BUT the Russians failed to take the two key objectives before the night came to a close, and so the Austrians won the game...damn their eyes....


Tuesday, 31 December 2024

20mm WW2 - Operation Martlett - British vs Germans - Rapidfire 2 Rules


Some photos from our 'big' Christmas 2024 Club game, Operation Martlett, using Rapidfire 2 rules.

Lots of laughs, lots of blown-up AFV's (apart from one heroic Hanomag which refused to give up), good food and good company. Nine members involved in the game, never easy, and thanks to Adrian for organising.


Sunday, 1 May 2022

**STOP PRESS** British blitz the French away from Hill of Arinez - GdA 15mm

 A scenario game, based on part of the Battle of Vitoria, Peninsula War 1813.

The French army were deployed and set-up to to defend the village and hill of Arinez, complete with cavalry reinforcements should they be needed.

French were Adrian, Steve K, and Bob, British were Robin, Norman and Guy.

The British moved forward quickly with infantry on the two flanks, and an artillery battery in the centre.

The British strategy was to advance quickly with the heavier force up the British right, push back the French, and then turn into the village and capture it, before moving on to the actual hill of Arinez.

Norman's infantry stormed forwards and quickly made contact with Bob's French left, using skirmishers, artillery and volley fire to force the French back, including a number of well-timed charges. This eventually meant the French lost two brigades.

Robin's smaller artillery and infantry centre, backed-up with some reserve cavalry, had slightly less initial success, but eventually forced Ade's French brigade to leave the table, and as the sun started to set, occupied the village after a short battle with the French occupiers.

Robin also saw-off the French cavalry.

On the British left, Guy's two brigades of veteran light battalions and 95th advanced through trees to the edge of the Hill of Arinez, and then up the rough slope to commence skirmisher and volley fire against Steve and Ade's defending infantry and artillery. Accurate and concentrated fire meant the British destroyed the French artillery batteries and all their skirmishers, and were preparing for the final infantry assault as the game ended.

The British won the game, having achieved three 'sauve qui peut' results and occupied the village of Arinez.

Thanks to Robin and Ade for organising the game, Steve K for his baking, and the rest of us for bringing along food. Lots of laughs and a great fun game.


Robin's battalion takes the village of Arinez


The British veteran light battalions inflict damage on the French skirmishers and artillery on the Hill of Arinez

Normans infantry brigades rush the Bob's French in the distance, while Robin's brigades prepare to face a French cavalry charge in the centre.

Steve's central brigade defends the village of Arinez

Norman's brigades get stuck into Bob's French.

Adrian and Steve's defenders on the Hill of Arinez await the British advance

The British light veteran battalions climbing the rough slope of the Hill of Arinez

The village of Arinez early in the game when all was quiet

Norman's forced march approaches Bob's French defenders

Yet another shot of Norman's battalions

Wednesday, 6 October 2021

Napoleonic Peninsula battle - French vs British

 ***STOP PRESS***STOP PRESS***

Players: Robin, Ray. Pete, and Adrian, Guy.

The French suffered a resounding defeat as they attempted to chase the British out of Spain.

The battlefield had a stream running up the centre, with a tributary (both of which had parts 'good going' and parts 'rough going', and a castille (chateau) where a bridge crossed the larger stream, somewhere approximately in the centre.

The French army was numerous, having a majority of line and recruit infantry across three brigades, four artillery batteries, and two cavalry brigades. Their main deployment was to the east of the stream, with two infantry brigades aimed at the castille area, and one infantry brigade to the west of the stream. The French cavalry also deployed well to the east, using the open ground to make quick progress around behind the castille.

The single French infantry brigade to the west of the stream set up a defensive position, placing their heavy battery on a hill to fire over their own troops.

The British deployment was entirely to the west of the stream. 

A brigade of KGL infantry quickly occupied the castille and set up a defensive position to the rear with artillery and a single square of infantry to face the massed French cavalry. A small Guards infantry brigade of two battalions reinforced this position, also setting up in squares behind the castille. 

Meanwhile the remaining larger British infantry brigade moved forward to the west of the castille to face the defending French infantry brigade, also sending two regiments of British cavalry around to attack this same position from the flank.

The battle in summary:

  • One French infantry brigade attacked the castille and was rebuffed, going into retreat. The second French infantry brigade didn't reach the front-line.
  • The French cavalry, having made quick progress around behind the castille, charged over the stream at the British flank, but were shot into retreat by determined British artillery and the three staunch squares.
  • The defensive French infantry brigade, heavily outnumbered it has to be said, had two battalions shot into dispersal, and although they rebuffed an initial British cavalry charge, succumbed to the second charge when a battalion in column failed to get into square, became unformed and was ridden down. The brigade effectively ceased to exist.
The battle was over, and a famous British victory was had (and a good job the victors get to write the battle report 😁). Tally-Ho.

In fairness to Robin, he had two inexperienced GdA players on the French side.


Wednesday, 26 January 2011

World War Two Desert Action

At 12:30 on a dark night two vessels crept slowly from the sea towards the harbour at Safi on the North coast of Morocco. This was the start of our first venture into 20mm WWII using the Rapid Fire rules.

Turns)1,2,3) The vessels managed to enter the harbour before they were spotted and the coastal guns opened up on them. Either the gunners were sympathetic to the allies cause or they were only firing “Pour la Honour” as they managed to avoid any damage to the ships.

4) The converted destroyer Bernacole moored alongside the mole and two companies of the assault force disembarked while the LCM following made for the beach designated Green in the attack plans.

Again the French guns failed to damage either of the vessels but the guards around the harbour were now alerted and were starting to respond and shots began to hit the armoured decks. The companies of the Moroccan Tirailleur Battalion who were barracked in the town of Safi itself began to assemble in the town square.

5) The following turn a Stuart tank rolled off the LCM followed by two scout jeeps, the first of which upon cresting the rise from the beach was hit by machine gun fire and destroyed with the loss of the driver.

The other two crew members managed to scramble out and take cover behind the dunes.

French troops occupying a house adjacent to the harbour launched a grenade attack upon the forces on the harbour mole but with no effect.

6) Exasperated at the French resistance to the landing the Allied commander decided to call in support. First the Battleship New York opened fire at the coastal guns and scored a direct hit

knocking it out of action for a while. Secondly a spotter plane from the Cruiser Philadelphia achieved radio contact and called in fire on the machine gun post located at the edge of area of scrub bush. No noticeable effect was noticed as fire was returned later.

Moving out off the beach the Stuart moved in to the town and was able to machine gun a squad of French who were marching towards the harbour causing them to scatter in to buildings. The second Jeep opened fire with its machine gun at a hut where French troops had been seen to be firing from, killing all inside.

The squad of allied troops on the Mole assaulted the house from where the grenades had been thrown but were held off by strong resistance.

Meanwhile the French had now organised all there forces and were moving their armour towards the harbour when a lucky hit by the 3” gun on the destroyer knocked one out.


7) A miss by the battleship on the coastal guns allowed the remaining crew to clear away debris and fire the gun again, this time at a group of LCVP’s heading in to the beaches designated Red and Blue, again a miss and the craft sail on.

A second assault on the house causes casualties but the defenders hold on for a while longer. Meanwhile other troops start moving past the houses in search of the Post Office. The Stuart tank and remaining Jeep make a bold dash out of town in an attempt to capture the French barracks and hopefully plans of the defences.

A second barrage of shot from the cruiser caused only minimal damage as the spotter plane passed over the area again although this time it had to avoid shot from an AA machine gun.

A wildcat fighter plane was called up to strafe the area where the machine gun had been firing from and the gun fell silent.
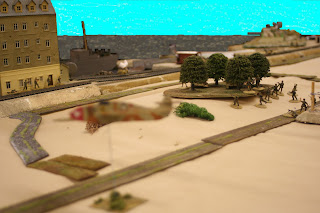
The destroyer managed to get a clear sight on one of the French tanks as it rounded a bend in between hills and a direct hit managed to destroy it

Meanwhile the French managed to send support in to town in the form of an armoured car which managed to sneak past the advancing Stuart.

In response to the wildcat the French sent their own fighter in to strafe the troops still on the mole.

8) A third volley by the New York again hit the coastal guns and disabled them for two turns.

The assault on the house finally succeeded and troops started making their way into town while the wave of LCVP’s closed on the beaches.The two fighters met in aerial combat and drove each other off. The spotter plain from the cruiser kept a low profile and avoided being noticed by anyone.

The Stuart tank moved up to the road junction while the Jeep continued to follow, this came under fire from troops hiding on the hill but received no damage. In the distance the Stuart could see a French tank and took a shot but only lightly damaging it.

The a/c managed to work its way around the town and held off an assault on a second house on the coastal side while more allied troops attacked a third house and inflicted sufficient casualties to drive the French out.

9) One more volley on the coastal guns was sufficient to destroy them and clear the harbour of any covering fire. The LCVP’s now reach the beach and troops start to land.

The Stuart manages another shot before being destroyed at close range by the French tank.

An assault with a/t grenades causes the a/c to withdraw while the troops occupy the house vacated by the French.

10) The wildcat makes its final run at troops of the French Foreign Legion causing some injuries before retiring back to the carrier Santee.

Troops leaving Red and Blue beaches come under fire from a French light tank and foreign legion troops, the troops on blue beach taking considerable casualties. Fighting in the town is halted as the a/c patrols the streets and forced allied troops in to cover.

The scout Jeep attempts to out flank the French tank and is shot by machine gun fire causing it to be destroyed with all crew.

French attempts to being a 25mm a/t gun in to play were negligible.

11) The spotter plane managed to drop three bombs on a group of troops centred around the light tank but achieved no hits.

Troops in the town were still pinned down by the a/c while troops from Red beach managed to break out and head for the train station.

At this point we called it a day with a French victory as the Allies had not reached any of their objectives although the station was within reach for 5 points. The Allies were trying to capture 30 point of objectives by turn 15 which did not seem likely.

If playing the game again I would increase the speed of the landing craft as on calculation there was not enough time to bring on all the successive waves before turn 15 at the current speed.

Given that this was the first time and everyone was still learning the rules 15 turns would be achievable in future games.

Thursday, 18 March 2010

The Battle of Whalley (Revisited)

An English Civil War Battle between the Earl of Derby (Royalist) and the Parliamentary forces under the command of Bereton. Played in 6mm using the Perfect Captain rules
As per the original the parliamentary forces were hidden from view at the start of the battle with only the presence of dragoon’s to tempt the royalist forces forward. The Royalist commander sent forward Tyldsley’s regiment and Houghton’s horse to chase them away and to take possession of Read Hall which lay astride the two roads leading north from Whalley.

After a feint forward the parliament dragoon’s retired to the hall and took up a defensive position. The parliamentarian cavalry to the North and East of Read Hall showed themselves to draw Houghton’s horse away from the Hall and leave the shot to deal with Tyldesley’s regiment. As the royalist horse passed the hall the parliament dragoon’s fires inflicting some slight damage but alerting the royalist forces in Whalley.

Tyldesley’s regiment were advancing further East than parliament had hoped for and while the dragoons held of the royalist shot the remainder of the troops had to reveal themselves from the cornfields, where they had taken a fortified position behind the enclosing walls, and advance towards the pike. To the East the parliament horse advanced in caracole with ineffective shooting before the royalists charged in to melee. This fight first went to the royalists who gradually pushed the parliament horse back up the hill before they rallied and then forced their way down again.

In the centre both Tyldesley’s shot and pike had taken heavy casualties and were withdrawing towards Whalley but the remainder of the royalist forces were now starting to arrive on both flanks. The parliament dragoon’s attempted to ride out and finish them before the reinforcements arrived but were threatened by Derby’s horse and had to retire back to the hall. To the West the remainder of the parliament forces retired back to the cornfields in the face of superior forces.

The rules play well but with slight differences for different periods we occasionally get confused with which rule to apply.

Words: Adrian